 |
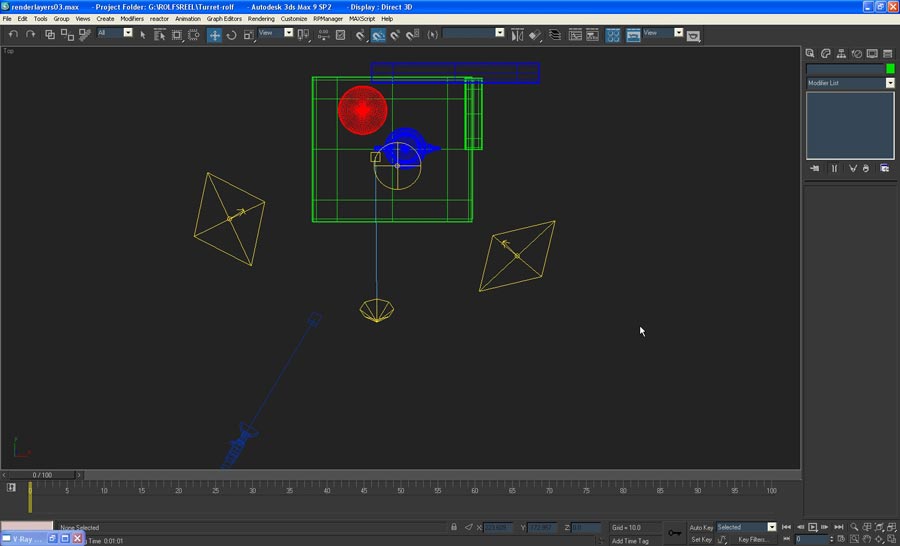
This is just to show my light setup for the scene. I used 2 vray plane lights, one spot light with vray plane shadows, and the circular light over the teapot is a vray light set as a dome, being used as a way to utilize IBL with an HDRI. |
| |
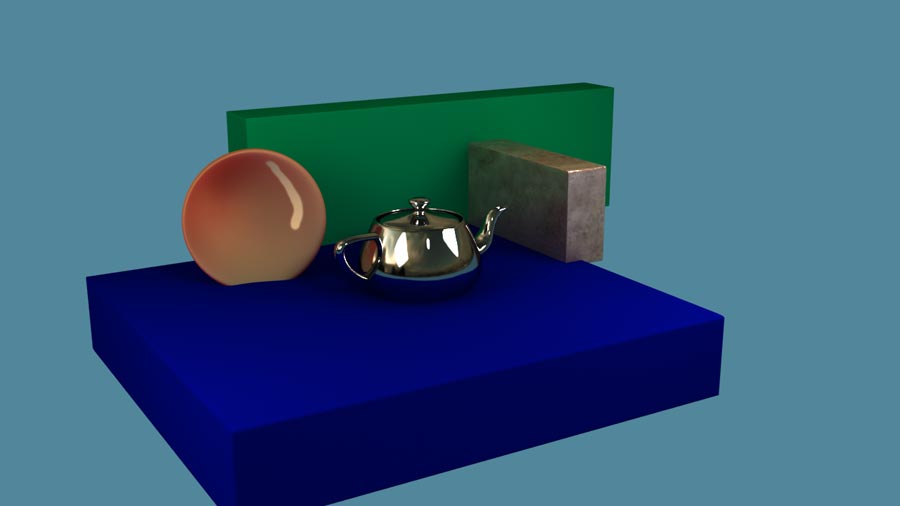 |
This is the example scene which utilizes different materials so I can show setting up reflections, refractions, spec, shadows, and other ideas. |
| |
|
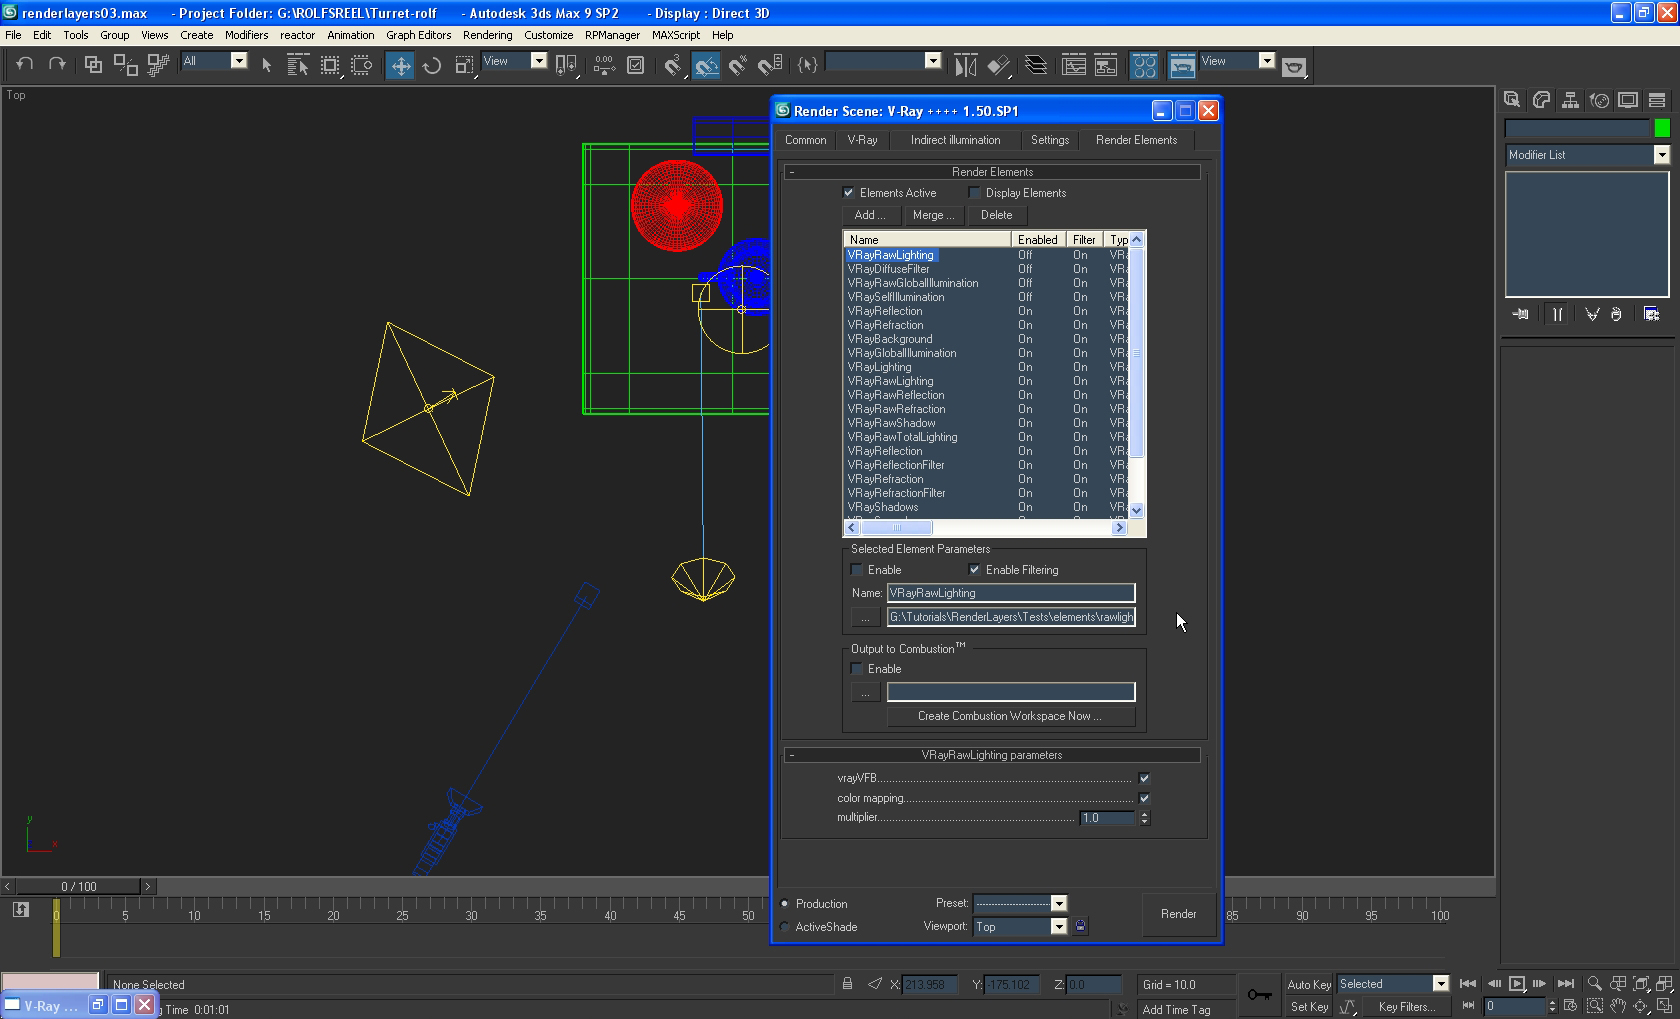
When you open up the vray render panel in max you get a series of tabs, the one all the way on the right is the one we are lookin for. (When you open it the main box won't have the list like mine does, it will just be blank.) |
| |
|
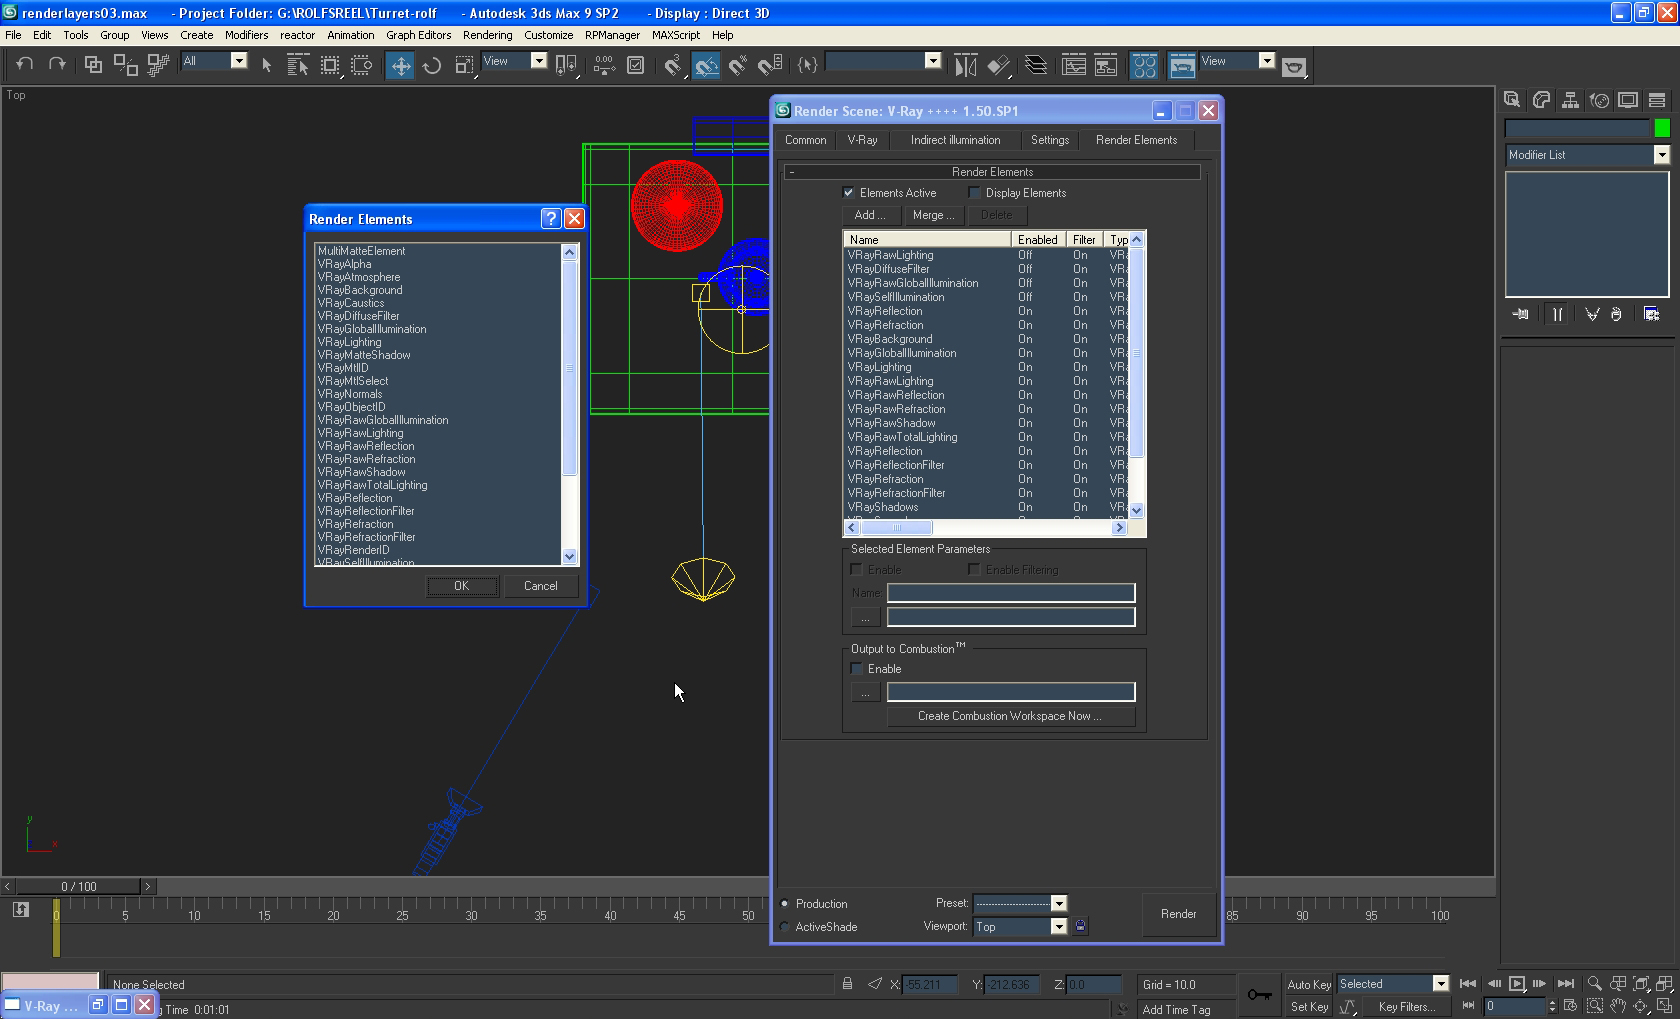
By clicking "Add" on the render elements tab you will be able to see a list of all the available vray render elements.
It should look like the one shown above.
|
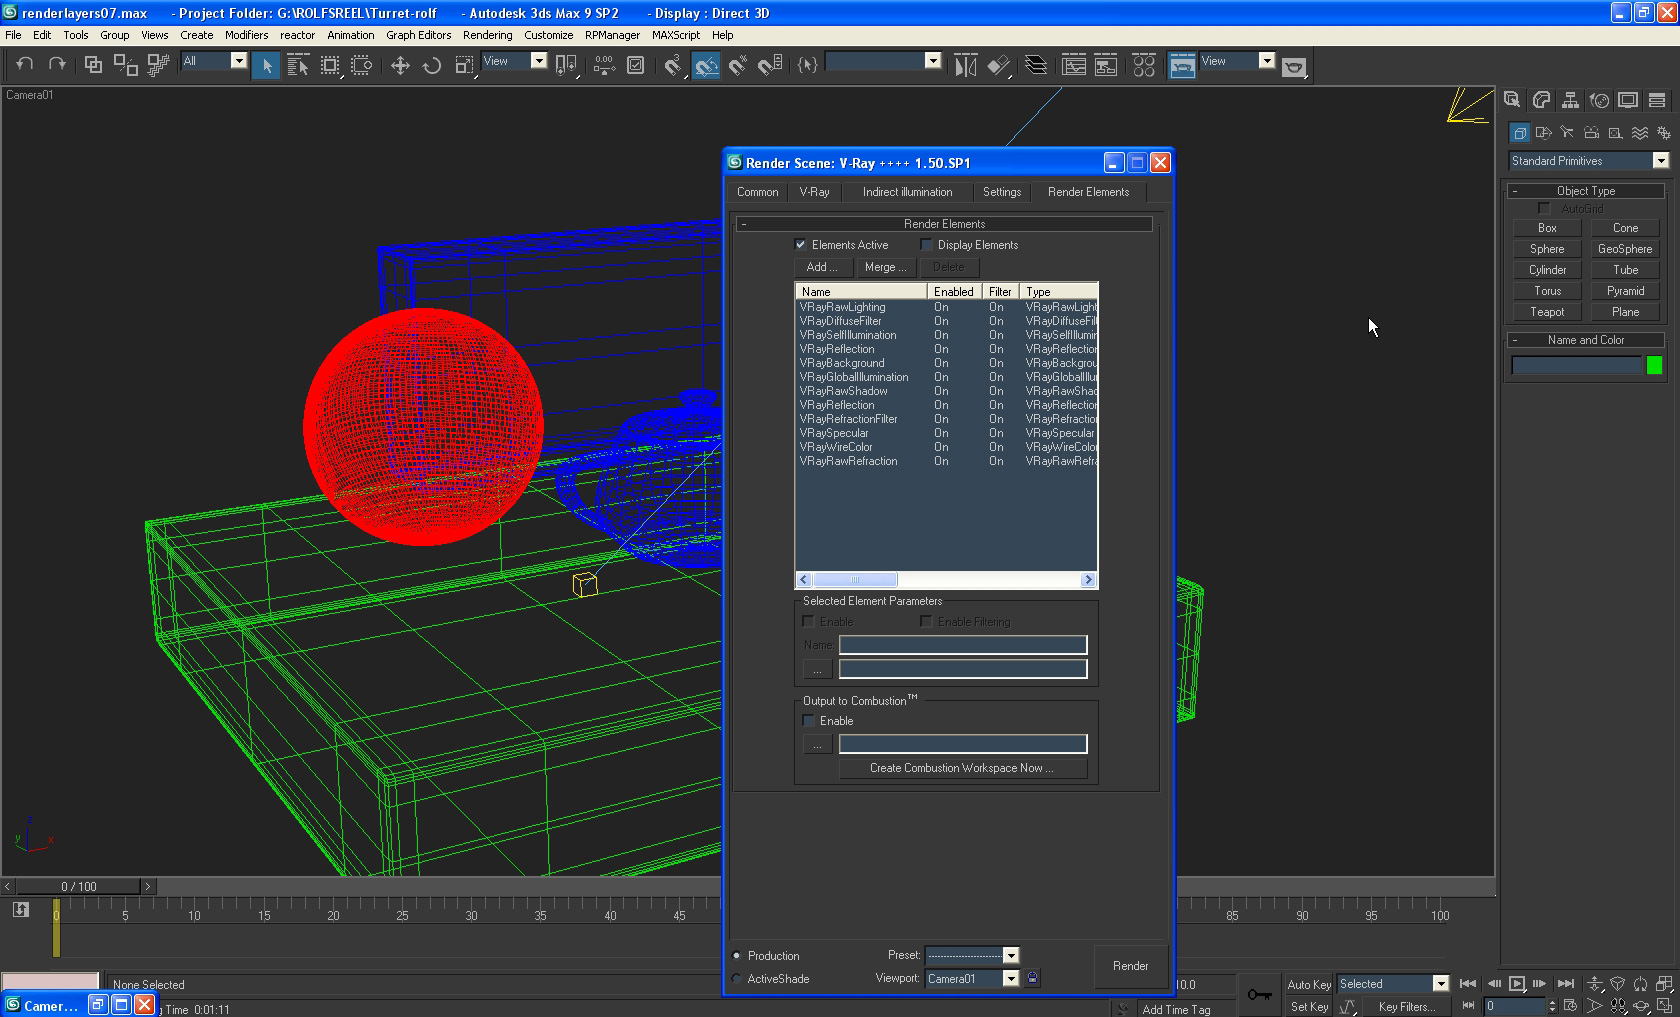
The elements I will be using in this demo are: |
|
Diffuse Filter
RawLighting
GlobalIllumination
SelfIllumination
RawShadow
Reflection
RawRefraction
RefractionFilter
Specular
Background
Wirecolor
|
I rendered out self illumination to show how it would be added though its just black in my example. |
| |
In theory, every element that is offered as a Raw and also has a Filtered version you are able to multiply the Raw and the Filtered to get the same output as the normal, unfiltered and non raw element. In this example I could use the RawReflection and multiply it by the ReflectionFilter, however, the output images aren't perfect yet and you get a slightly muddier final image, so for this example I used only the reflection pass instead of multiplying the filtered and raw. |
Tricks and little bits of knowledge like that are always good to have because they can end up costing time to re render if you aren't aware before you start. As a warning I'll say some of the max materials do not play well with assembling the final frames in layers. Some max materials, like shellac, create an impossible GI only element that is overly bright, so it is always best to test a single frame before rendering a sequence. |
This assembly can be done in photoshop as well. The add function in photoshop is called "Linear Dodge" |
| |
File Formats: I am using all TGA's in this example because they save the alpha in the image and the alpha can be extracted very very easily it is also automatically utilized by compositing programs. Also, if you don't have a ton of frames to render they do compress very, very well. If you are completing a 30 second spot you are probably going to want to use a better organized file format; such as OpenEXR. |
|
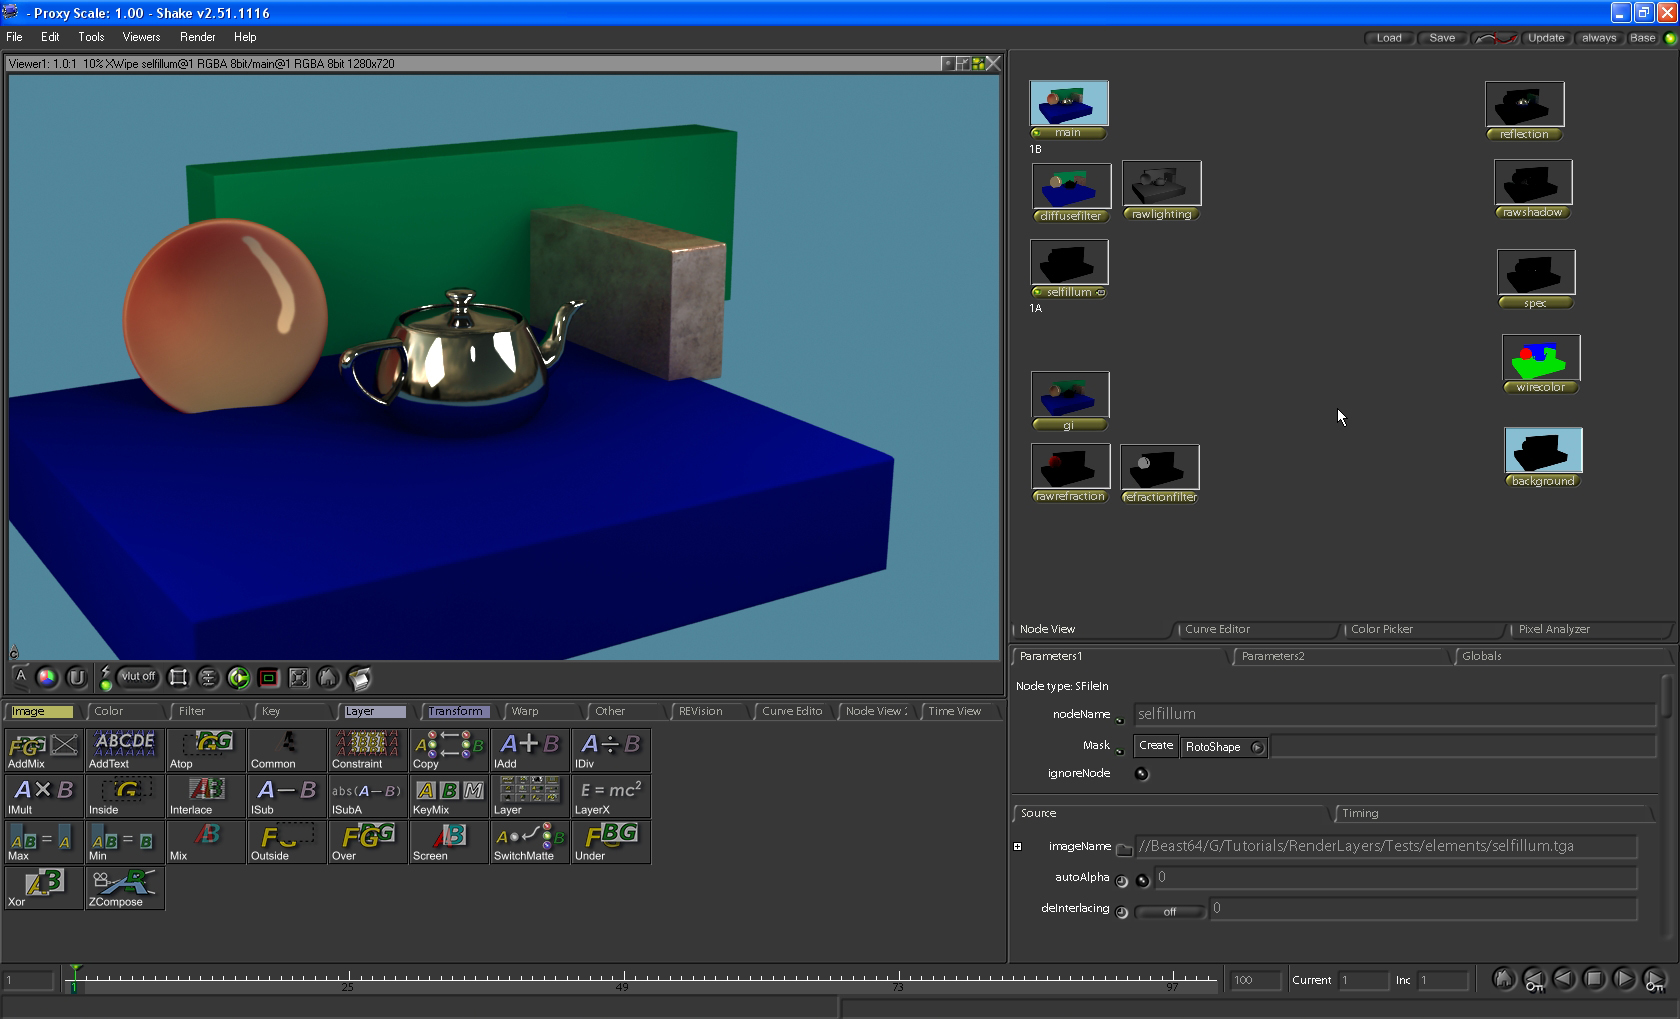
In Shake I have imported all my elements and laid them out for pleasant linking. |
| |
|
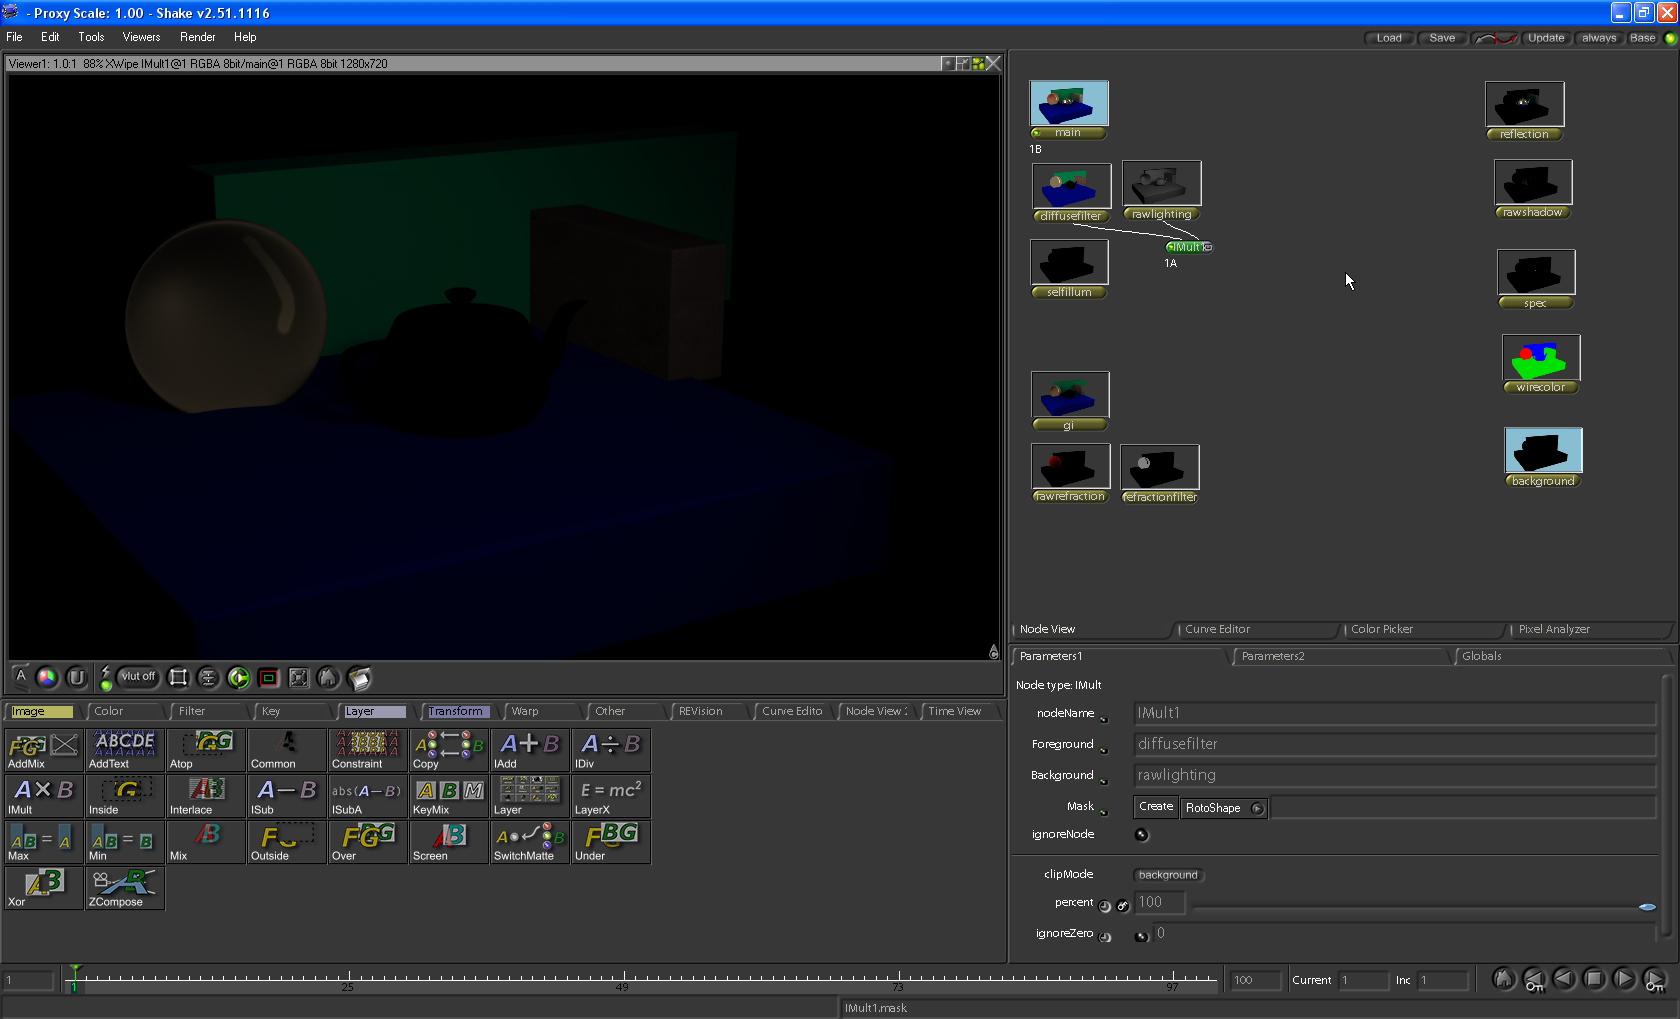
To create the equivalent of a direct light pass you will need to multiply the DiffuseFilter by the RawLighting pass. Using a simple Mult node found under the layer tab in shake will work perfectly. |
| |
|
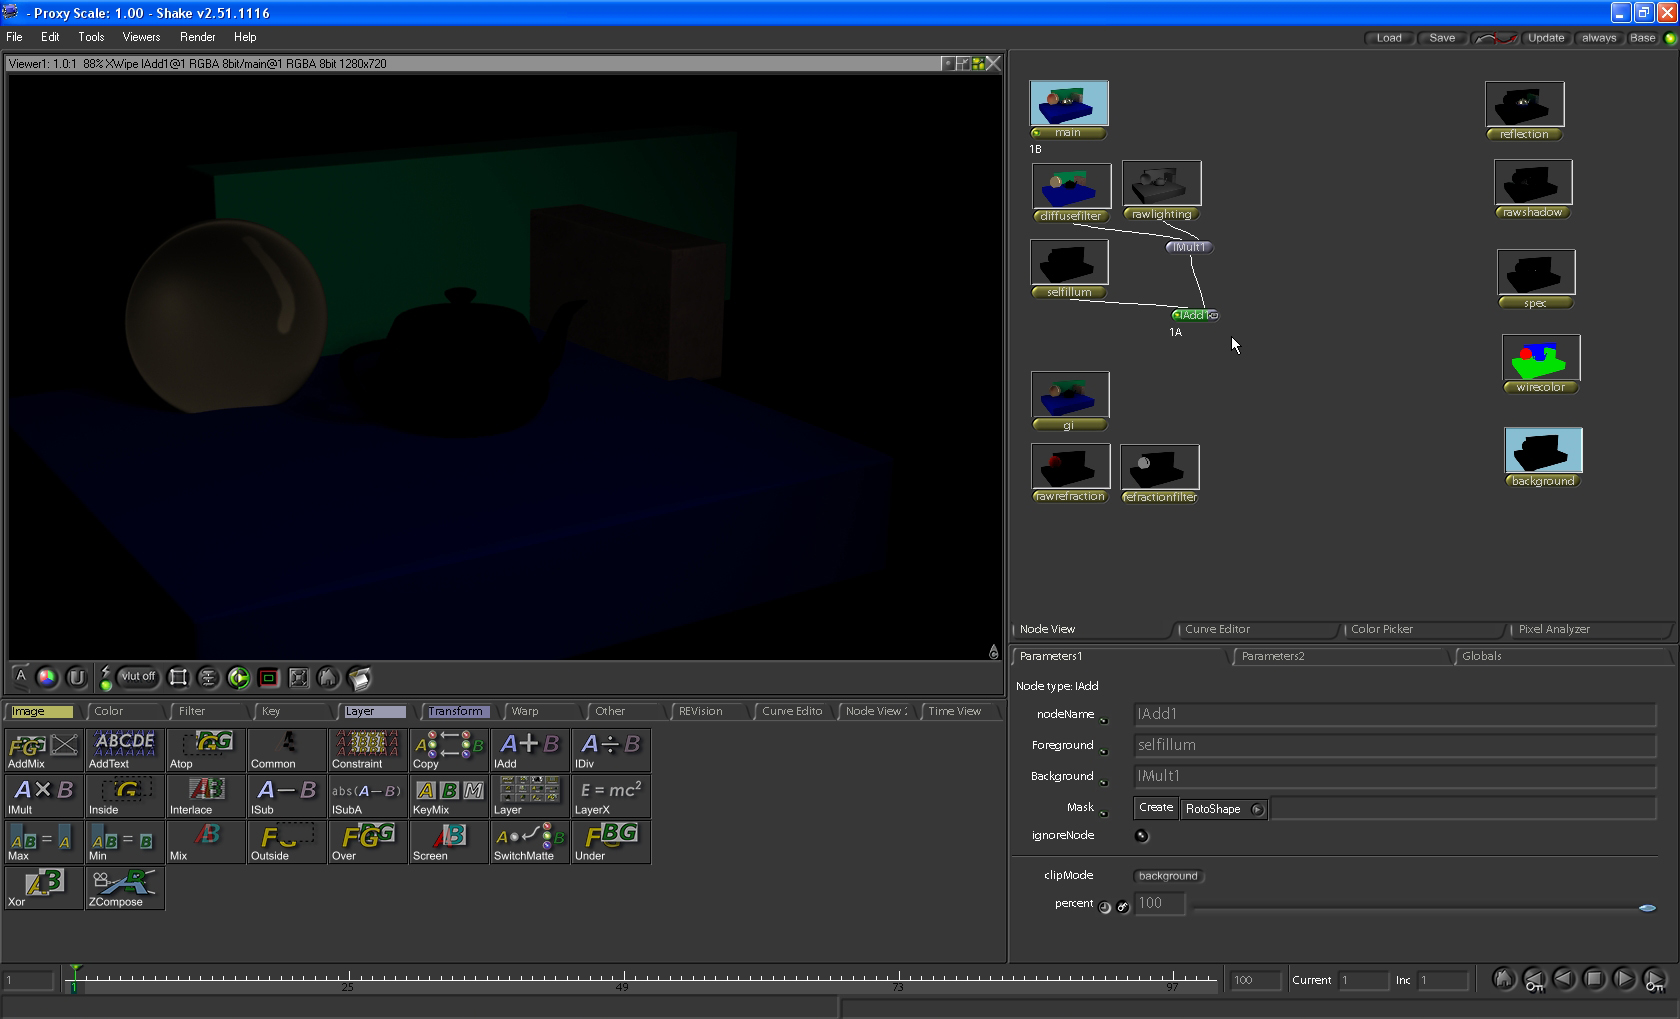
I don't have anything in my SelfIllumination pass but I'll add it in as if I did in order to show where it would be added. Using an add node found in the layer tab will be used for this. |
|
|
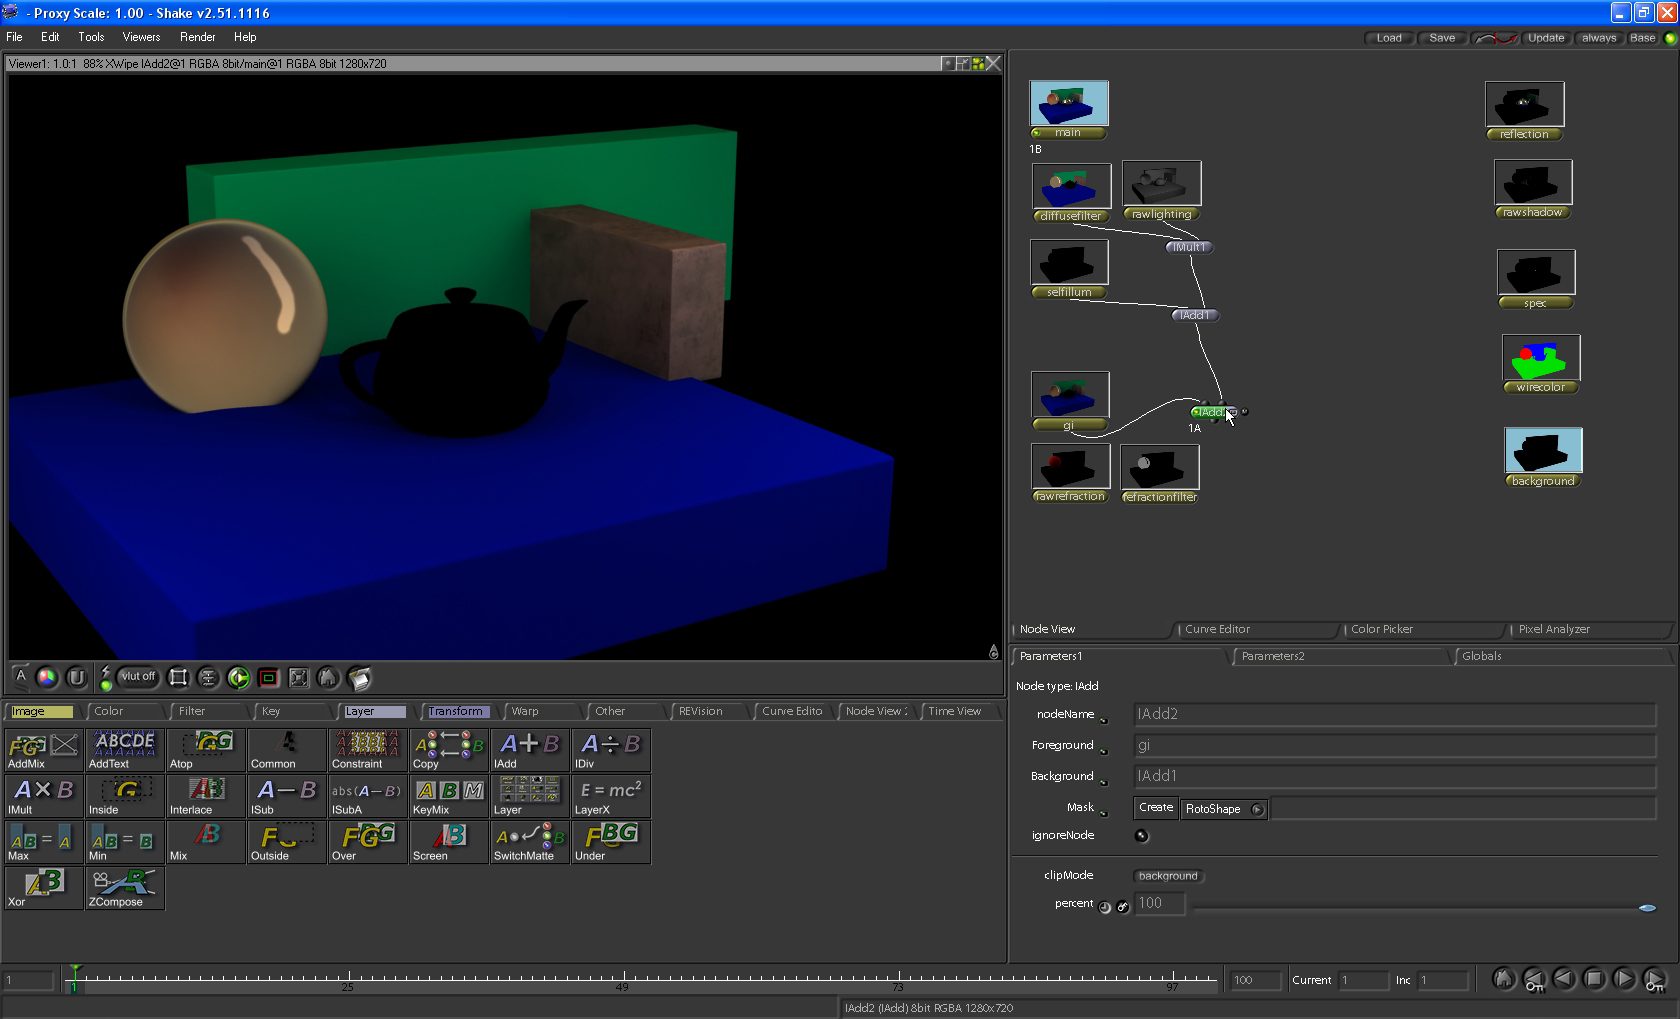
The GI (global illumination) pass is added to the previous two. |
|
|
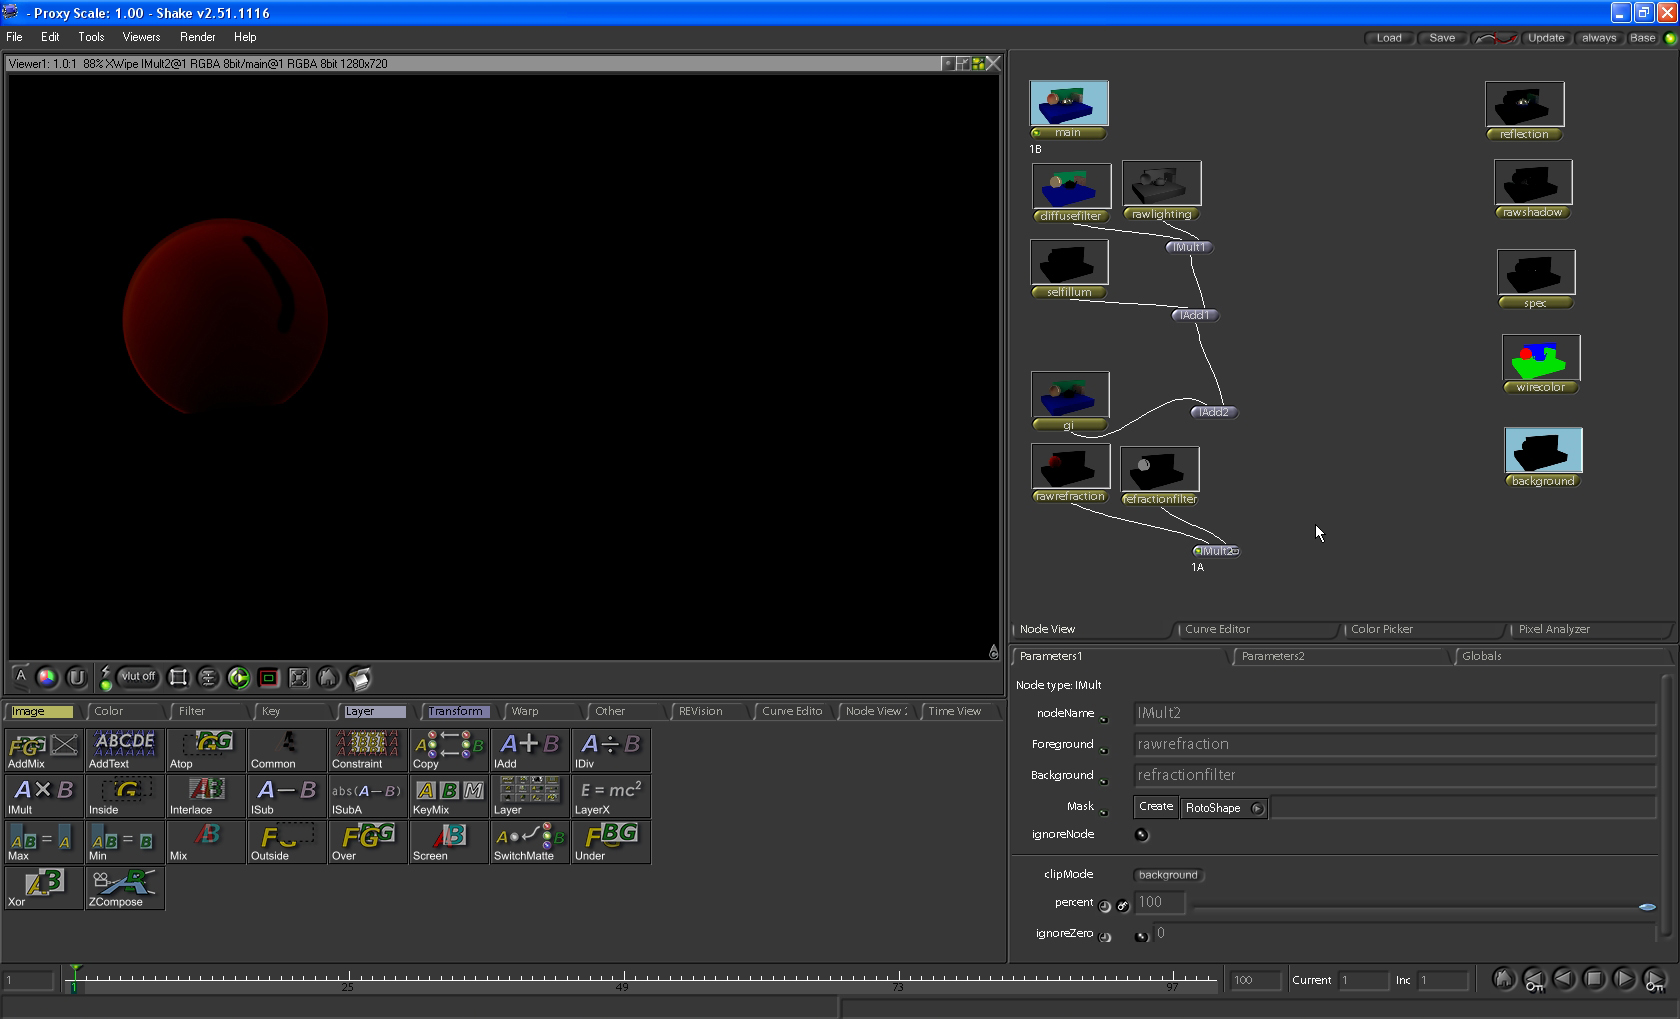
Again, to achieve the true refraction pass we will take the RawRefraction pass and multiply it by the RefractionFilter pass. |
|
|
Just like before it is added to the other passes. |
|
|
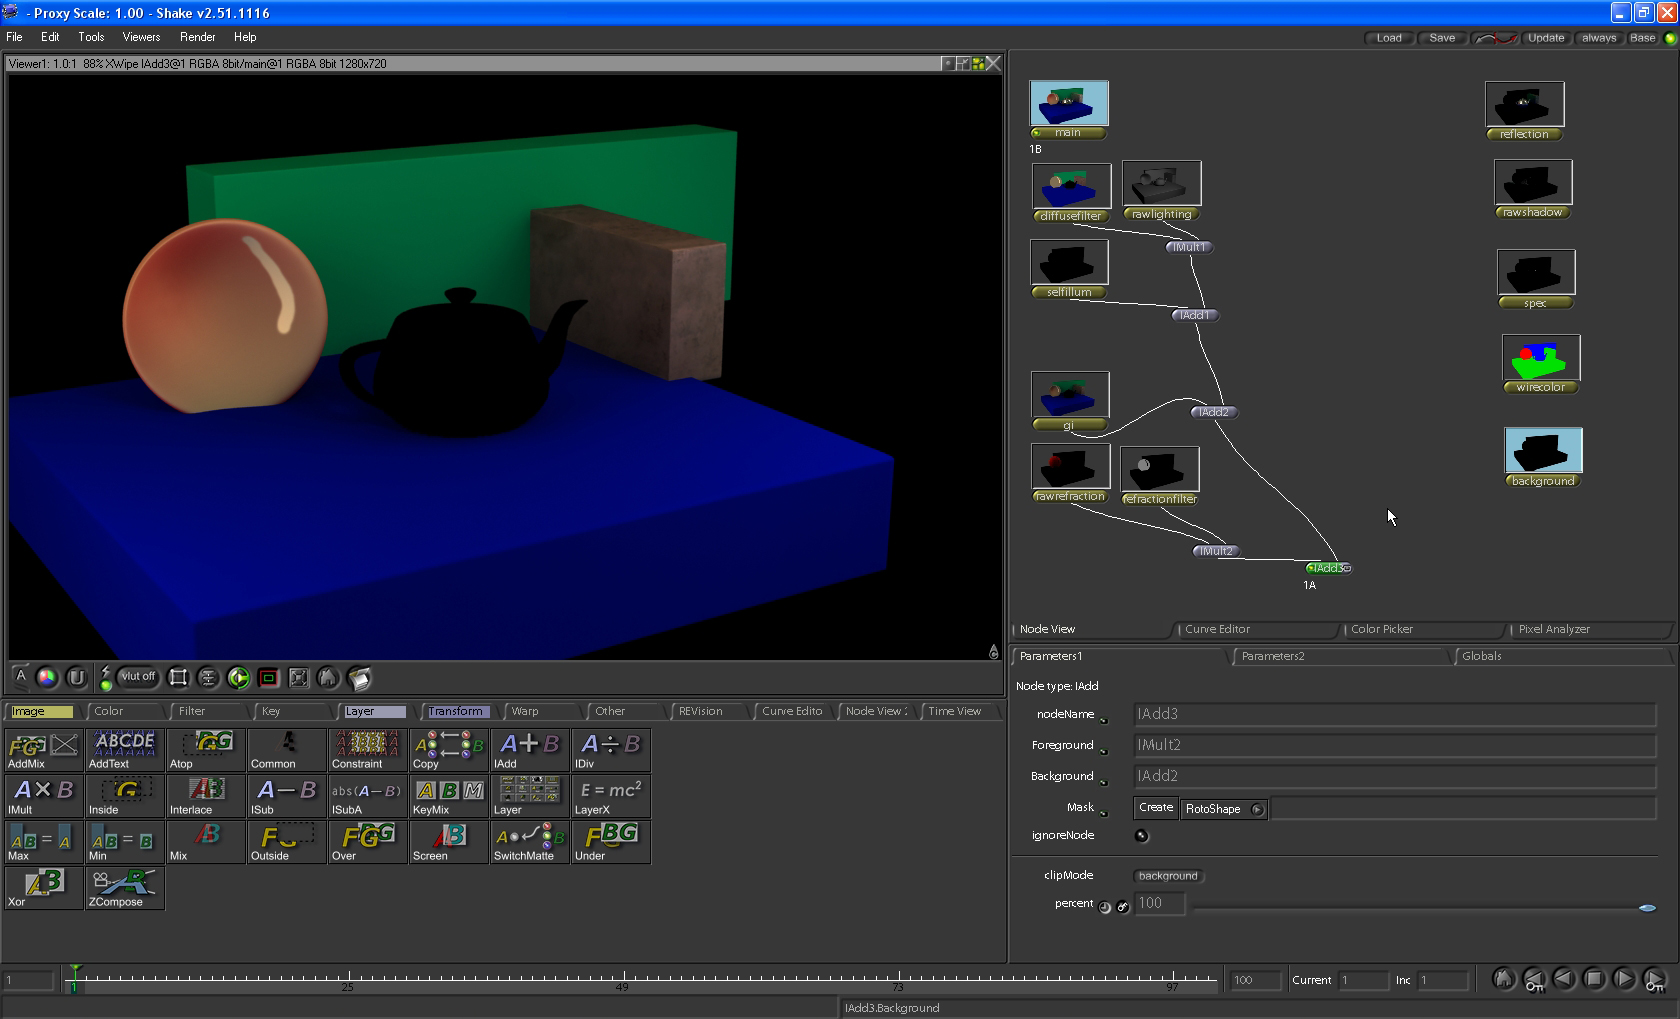
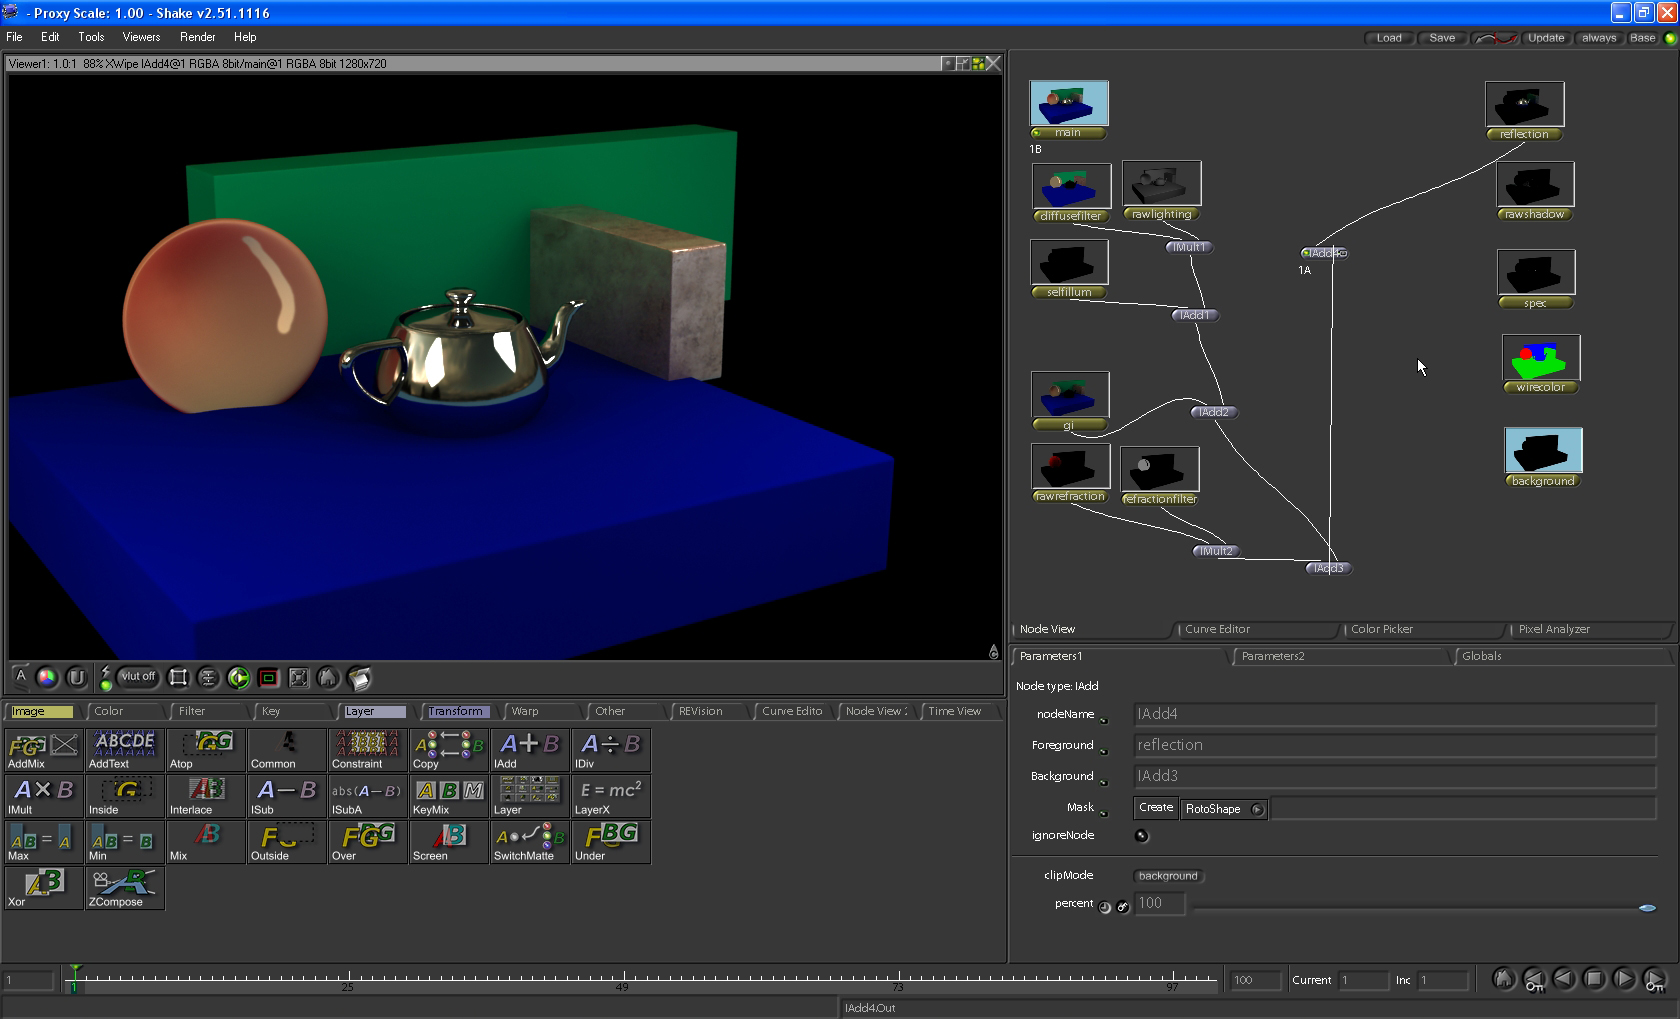
My noodles are starting to get a bit tangled but I added the resulting output of the refraction-gi addition to the right input of the add node on the reflection pass. |
|
|
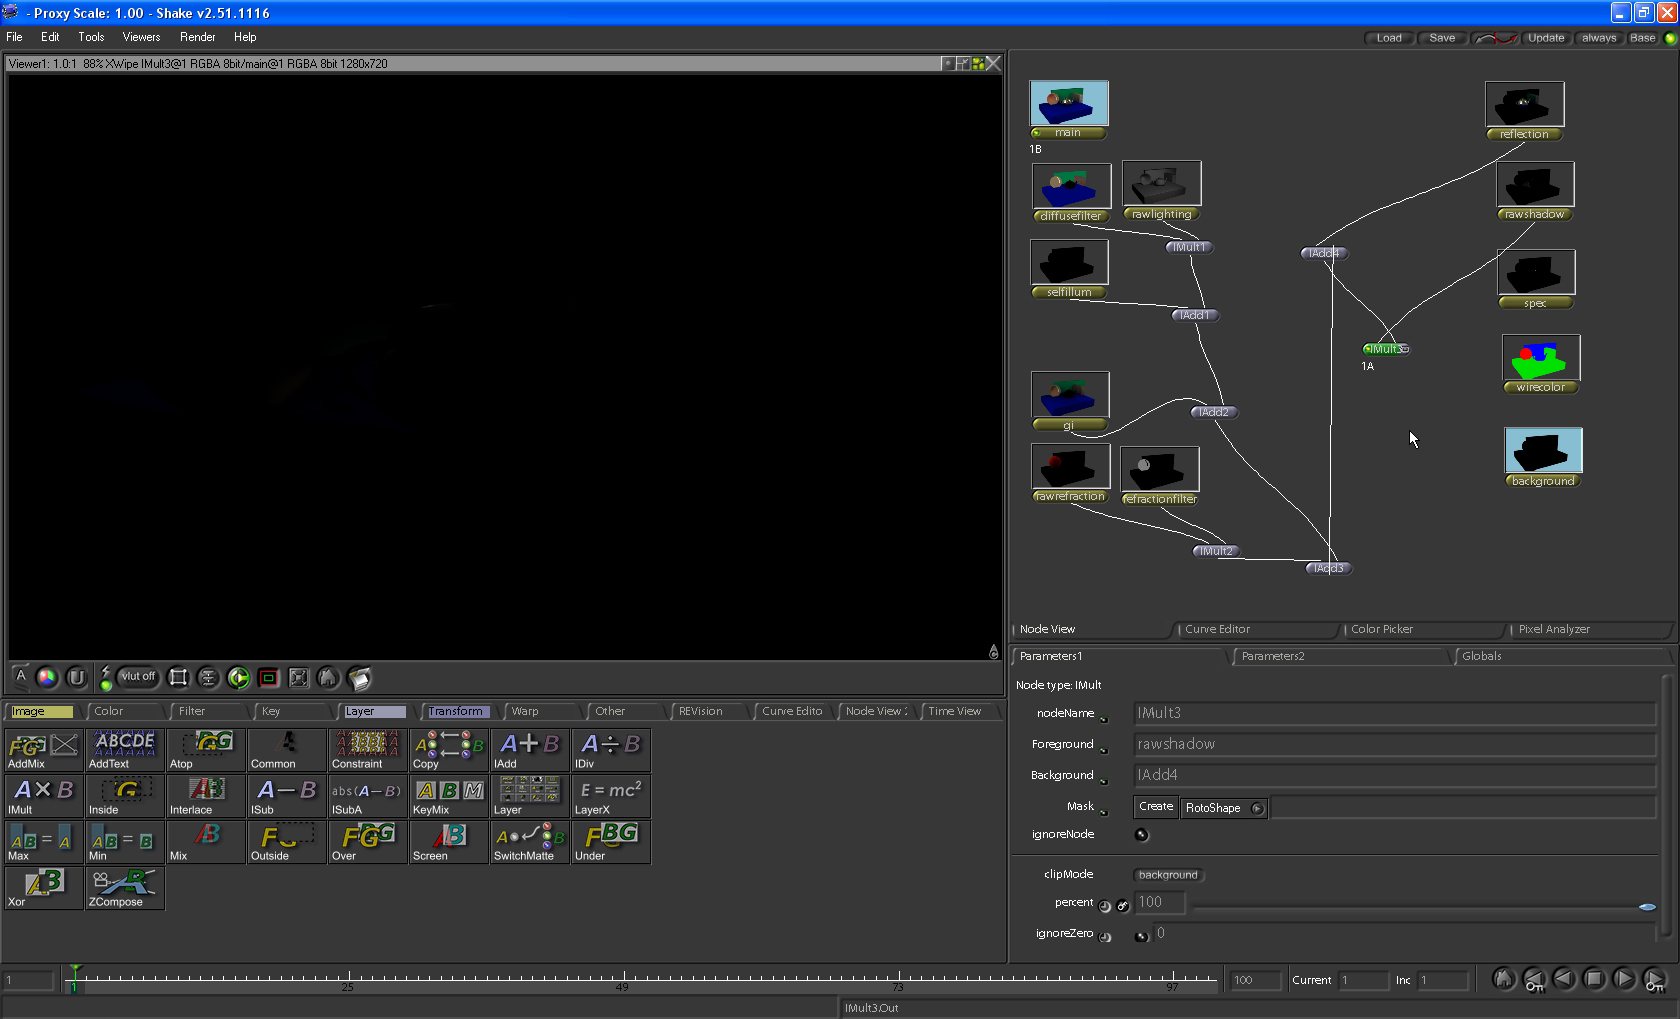
If you've jumped ahead you'll find an issue with adding the RawShadow pass. Shadow passes need to be multiplied as a darker overlaying effect is desired. However, only multiplying the RawShadow pass again produces an unwanted effect, clicking the above image shows the result of only multiplying. |
|
|
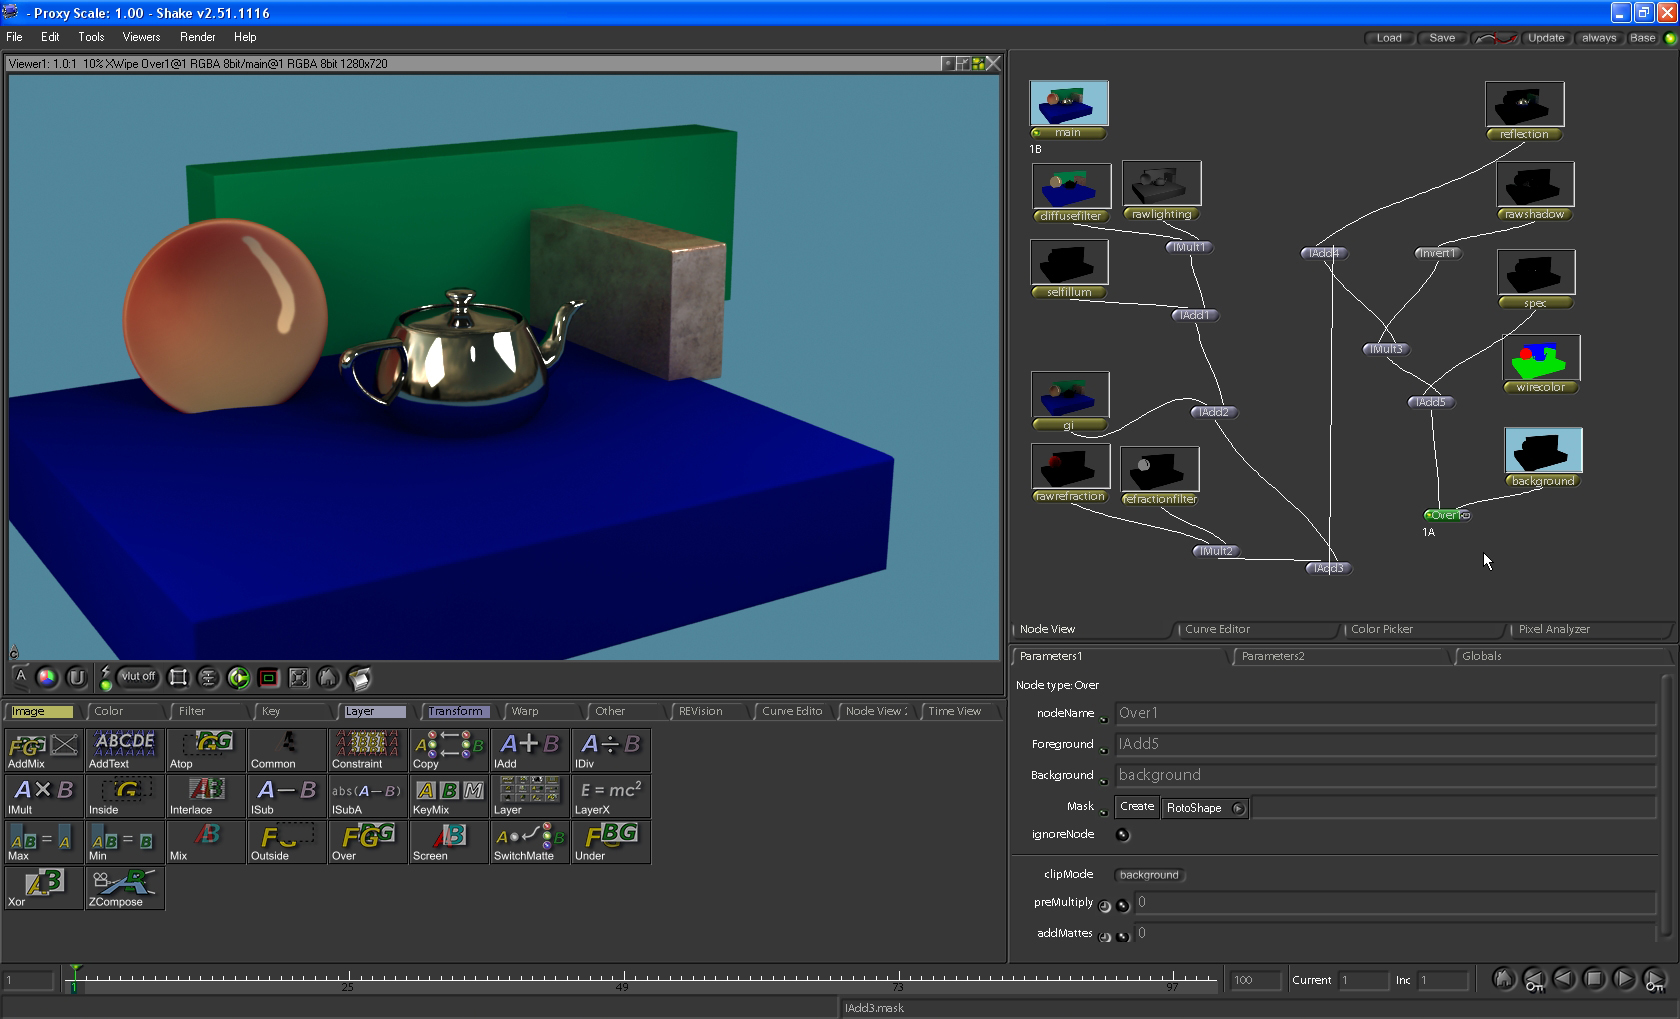
To correct the issue an Invert node must be added. Invert can be found under the color tab. The result is subtle in my scene but is necessary. |
|
|
Back to adding, the spec layer is added. A note - Only my non vray light is producing a specular highlight so if you don't have a max light in your scene you may not have any spec in your spec pass. |
|
|
As one final step, take your final image and throw it over the background using an over node found in the layer tab. Make sure the background is plugged into the right input on the over node or else it will be on top of your other composited image. |
|
This is a very crude example of how to composite render elements in shake. Its pretty obvious that by setting up the final output this way any individual pass can be color corrected or adjusted or masked, etc... The possibilities for adjustments and tweaking are pretty close to endless. |
|
Final note- I rendered out a Wirecolor pass in this tutorial but didn't use it because I decided that wirecolor is just way too powerful to try and squeeze into this tutorial so I will be breaking it off into its own tutorial to show how limitless and powerful it is. |
|
If this has helped in any way or if you found a flaw or have a suggestion please let me know.
DanManther@gmail.com |
| |
|